
Getting Started with Nicky
From sign-up to a connected, funded account in about 15 minutes.
Nicky is a non-custodial crypto payments platform – we never hold your funds. Instead, Nicky connects to a wallet you already control, so payments go straight to you. That’s why this guide has one goal: get your account created and your wallet connected.
What you’ll need
- An email address (or a Google, Microsoft, or Apple account).
- An account with an exchange or Wallet Service Provider (WSP) – for example Coinbase, Kraken, or Foxbit – or fixed wallet addresses for the crypto assets and blockchain networks you want to receive. Don’t have one yet? Create one first – it’s where your money will actually live.
Create your Nicky account
- Go to nicky.me and click Get Started (or go directly to https://pay.nicky.me/register).
- Sign up with your email and a password, or continue with Google, Microsoft, or Apple.
- Fill in your profile: first and last name (kept private), a public name (what payers will see), your country – and optionally a website and profile picture.
- Open the confirmation email, click Confirm my account, then log in.
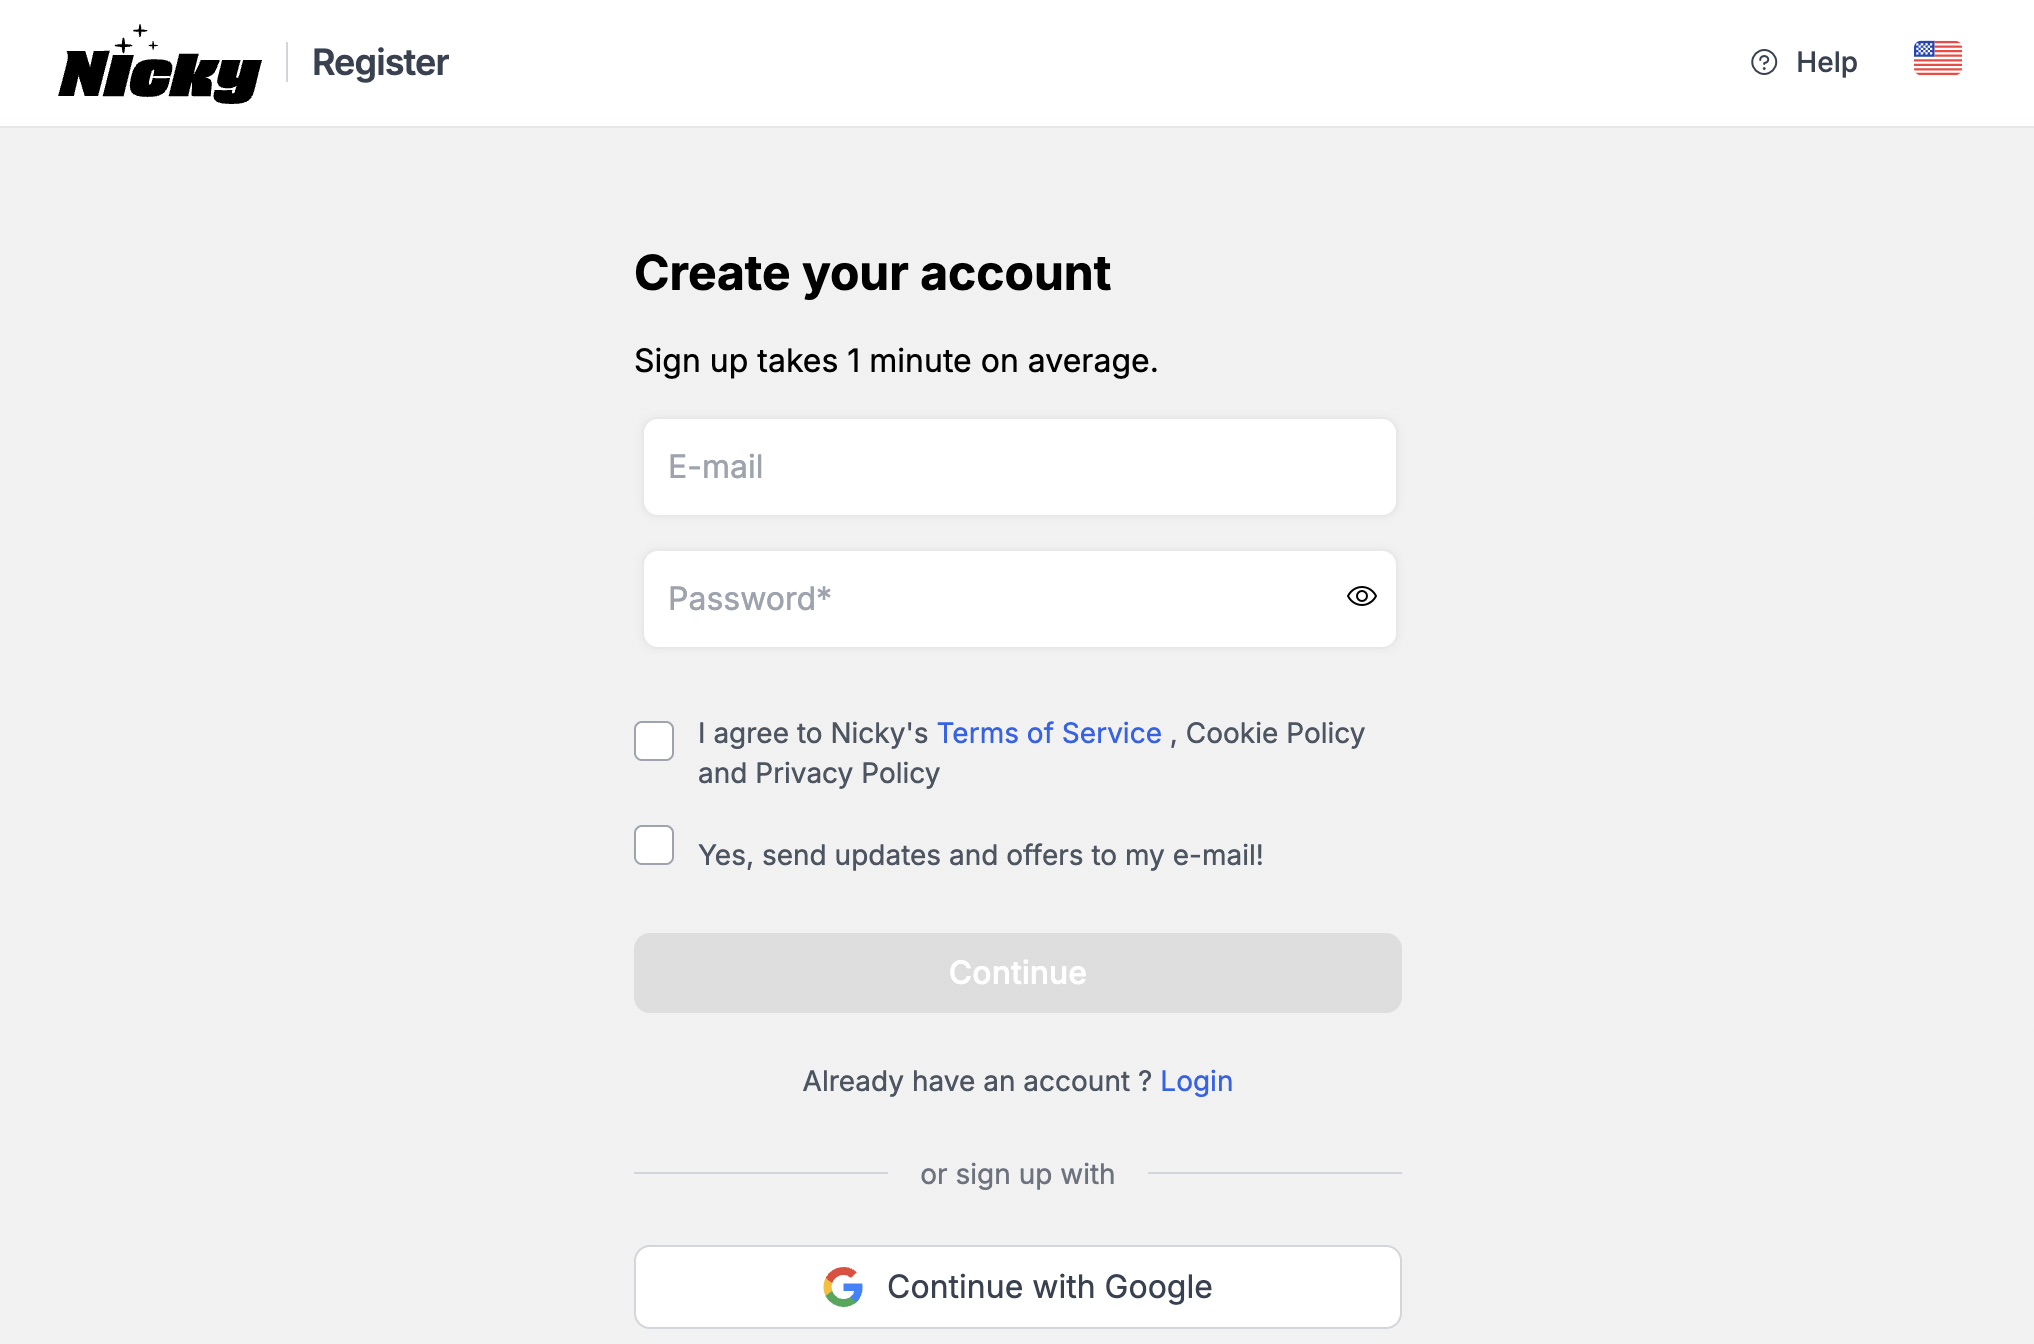
Checkpoint: You can log in at pay.nicky.me.
Choose your pricing assets
Pricing Assets represent the denomination of the invoices that you create. Example: you want to charge someone USD 100, therefore the Pricing Asset is USD.
- Click Settings in the top menu.
- Open Merchant Configuration.
- Select the pricing assets you want to use when creating invoices, and save.
Tip: You can change these anytime – but doing so changes which denominations you can use for new invoices.
Connect your wallet
Nicky can connect to your exchange or WSP using an API key, or you can route payments to fixed wallet addresses that you control.
3a. Connect with an API key – follow the guide for your provider:
Your Private/Secret Key is shown only once. Copy it immediately and store it somewhere safe, such as a password manager. If you lose it, simply generate a new key.
3b. Use fixed wallet addresses instead:
- Go to your wallet or exchange account and open the deposit/receive screen for the crypto asset and blockchain network you want to use.
- Copy the wallet ID or wallet address exactly as shown.
- Paste the wallet address into the Nicky interface for the matching asset and network, then save it.
Tip: Always match the asset and network. A USDC address on one network may not be valid for USDC on another network.
3c. Add the connection to Nicky:
- Go to Settings → Wallets and click Add Connection.
- Pick your Wallet Service Provider from the dropdown – or choose Manual if yours isn’t listed.
- Paste your API Key Name and Private Key, or paste the fixed wallet address for a manual connection. Optionally give the connection a name, and save.
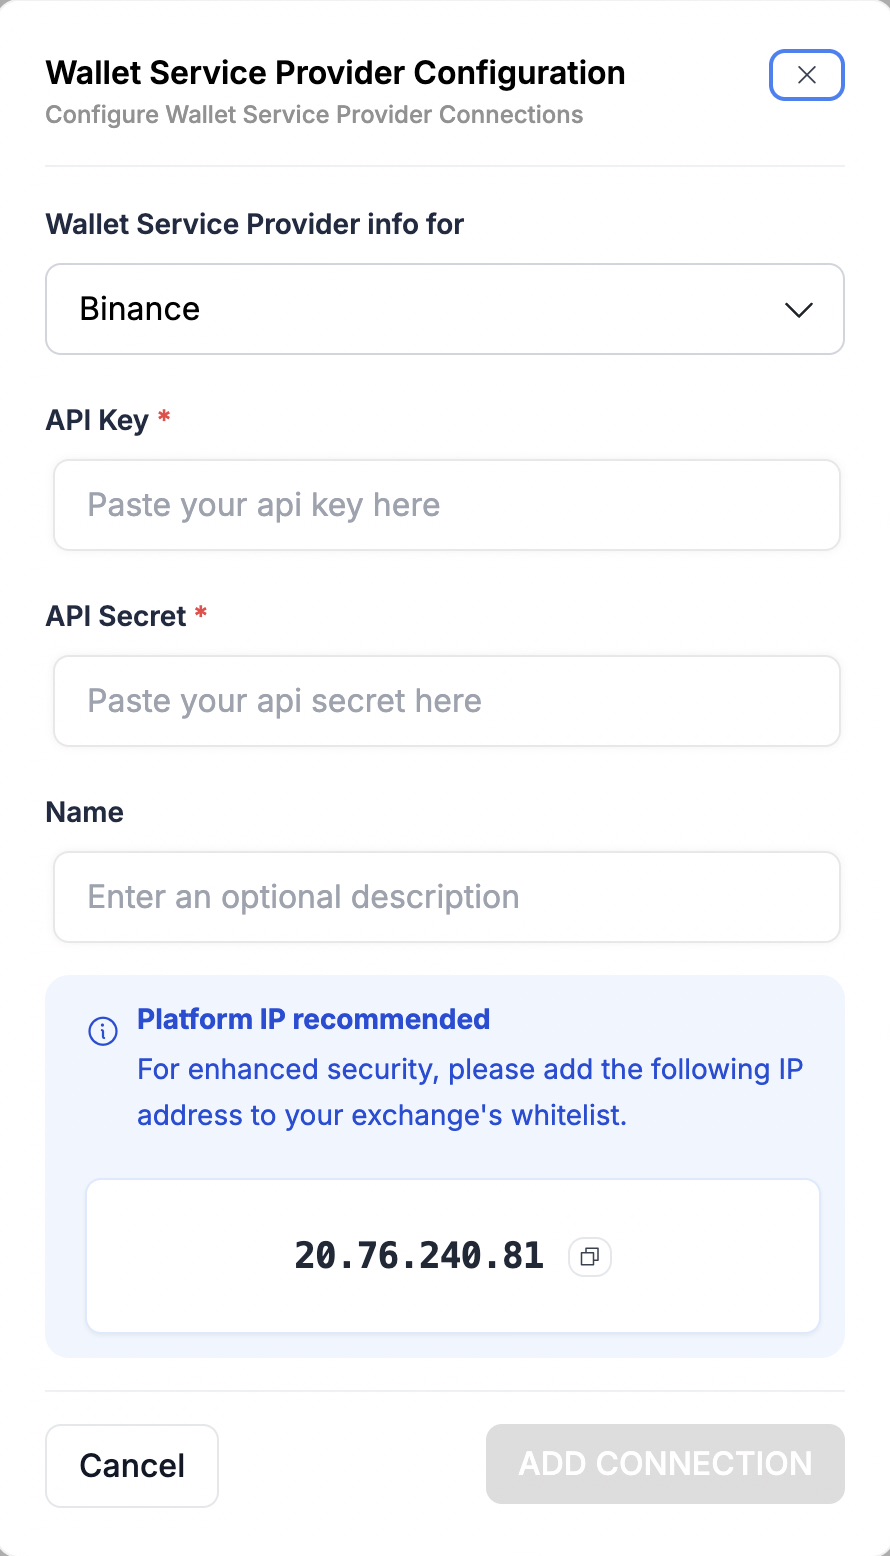
Checkpoint: Your connection appears in the Wallets list.
Set your payment routes
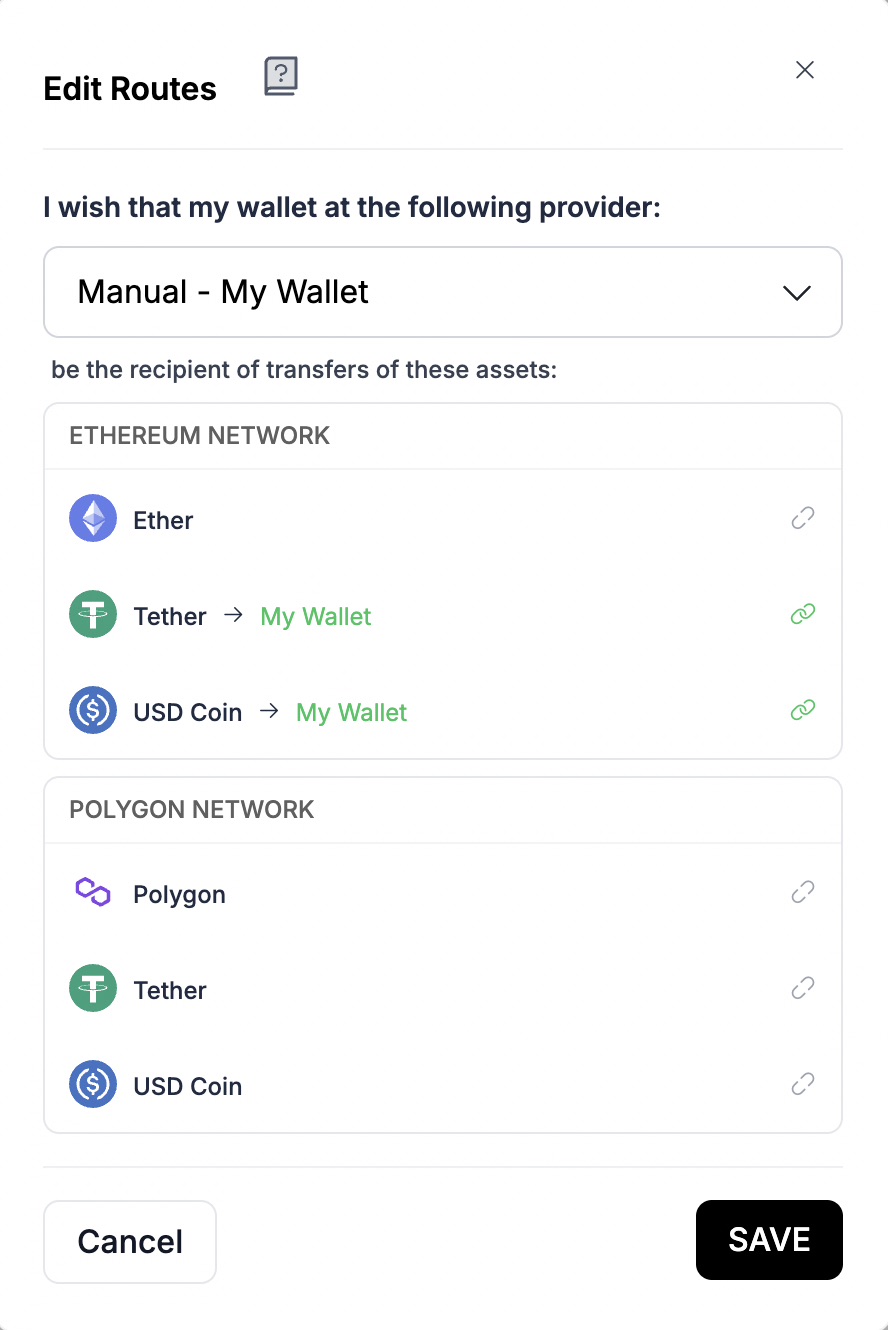
A payment route allows you to be paid with a given crypto asset through a given blockchain network. Payers always pay in crypto, and they will choose which crypto they wish to use according to your routes. For example, if you wish to be paid with USDC through the TRON network, you should setup this route.
- Stay in Settings → Wallets.
- For each asset you want to accept, select your connection from the dropdown.
- Select the assets you want to accept, then click SAVE.
Fund your account with Nickels
Nicky charges a small 0.4% usage fee per transaction, paid in Nickels – Nicky’s billing credits. Fees are deducted from your account balance, so you need Nickels in your account before payments can flow.
- Every transaction – including test transactions – is charged a 0.4% usage fee.
- The fee is deducted in Nickels from your account balance.
- Transactions will not be processed if your balance is insufficient.
Top up before you go live. If your Nickels balance runs out, transactions start failing after a 72-hour grace period. Set up billing first to avoid any disruption.
- Go to your Billing page: https://pay.nicky.me/billing
- Choose how to fund your account: crypto, bank transfer, or credit card.
- Add enough Nickels to comfortably cover your expected transaction volume.
Checkpoint: Your Nickels balance shows on the Billing page.
🎉 You’re fully onboarded!
You can now receive crypto payments – funds go straight to your own wallet.
FAQ
What are Nickels?
Nickels are Nicky’s billing credits, used to pay the 0.4% usage fee on transactions. You can top up anytime at pay.nicky.me/billing using crypto, bank transfer, or credit card.
Does Nicky hold my money?
No. Nicky is non-custodial and peer-to-peer: payments go directly to the wallet you connect.
Can I connect more than one wallet?
Yes. Add as many connections as you like and route different assets to different wallets.
My wallet or exchange isn’t listed.
Nicky is wallet agnostic. Choose Manual when adding a connection and use either the general API key guide or a fixed wallet address for the asset and network you want to receive.
Need more help? Use the contact form below and we’ll get back to you.